


We all have our favorite jewelry that we wish to carefully kept and care, to prevent them from in contact with chemical products, moisture, rust and damages. As we know, if our jewelry is not being organized properly, it irritates you when your desired jewelry is misplaced, lost, tangled and broken.

Hence, jewelry organizer is everything you need for time-saving and convenience. To read more on the benefits that you could enjoy from jewelry organizer, head over to our article now 👉 Reasons Why You Should Use A Jewelry Organizer
Jewelry organizer is available in different types and designs, which you could choose from jewelry box organizer, jewelry organizer stand, jewelry dishes etc. based on your preference.
But, did you know that you can make jewelry organizer yourself?
It is always fun to make your own jewelry organizer as you could design compartments that best suit to your jewelry collection and your style. The perfectly crafted jewelry organizer allows you to easily find your jewelry for your daily styling and also makes the perfect artistic display as decoration ornaments at home.
Looking for cool inspiration to DIY jewelry organizer of your own? We have collected a few brilliant ideas for DIY jewelry organizer from the talented creator that had DIY their own jewelry organizer. Hands on with these DIY ideas that are easy to make and stylish to display it in every corner of the house. These DIY jewelry organizers would also make a great gift for women who own jewelry!
Get creative with these DIY ideas to make a functional and stylish jewelry organizer now, just so your jewelry will no longer have to worry about where being of your jewelry now!
1. Simple jewelry organizer on wall
Learn how to make a wood jewelry organizer wall with Laurel from A Bubbly Life, where she had showed us her DIY jewelry organizer with mirror mounted on wall, that is amazing as organizer and beautiful as home decoration too.
Materials required as followings:
- Wood / plywood (based on your budget and preference durability)
- Hooks (The size used in tutorial is 1 inch)
- Wood Dowel (Optional) (Any size of your preference)
- Mirror (Any shape and size of your preference)
- Heavy Duty Glue
- Drill
Step 1: Outline the desired position of the hooks and mirror on the wood. Remember to take your jewelry sizes into considerations, especially the necklace lengths.

Step 2: Once positioning confirmed, to paste your mirror with heavy duty glue to the wood and drill holes to attach all the hooks.


Step 3: (Optional) Insert the wood dowel in between the hooks. It is suitable for displaying if bangle bracelet or hoop earrings or rings too. However, this step can be skipped if you prefer to have hook as the main holder.
Upon complete these 2-3 simple steps, your DIY wood jewelry organizer is completed!

2. Hidden jewelry organizer cabinet
Would you prefer a hidden jewelry organizer mounted on wall as an alternative option? Get the inspiration from Rachel of from Shades of Blue Interior for a detailed how to make a jewelry storage that is hidden, where you will learn how to build a jewelry storage cabinet yourself from scratch!
Here’s the tools and materials needed to build a jewelry organizer:
- Miter Saw
- Cordless drill
- Nail gun (optional)
- Heavy duty stapler
Materials:
-
1&1/2" nails, 18 gauge
-
3/4" nails, 18 gauge
-
3" wood screws for attaching storage box to wall or choose hang the cabinet with picture hanger hook
-
2 pairs of 3" flat corner brace
-
2 pairs of 2" flat strip brace
-
1 piece of Single Touch Latch
-
1 pair of 90 degree Surface Mount Hidden Spring Hinge
-
1 piece of 1" x2" Satin nickel Mosaic Aluminum Sheet
-
1 pair of 2" long Brass Middle Flat Hinge
-
3 pieces of Cabinet Knobs (Optional)
-
2 pieces of 9" White Key Hook Rack
-
1 piece of Magnetic Latch Kit
-
1 Mirror
-
1×4 board at 6" - Cut into 2 pieces with 22" long side with 45 degree miter cuts, 2 pieces with 15” long side with 45 degree miter cuts
-
1" wide Colonial Molding - Cut into 2 pieces with 9 & 1/2" short side with 45 degree miter cuts, 2 pieces with 16" short side with 45 degree miter cuts
-
1/4 sheet of 1/2" plywood - Cut into size of 20 & 3/8" x 13 & 3/8"
-
1×3 board at 6’ - Cut into 2 pieces at 22", 2 pieces with size of 13 & 1/2"
-
1/4 sheet of 1/4" plywood, Cut into size of 22" x 15"
-
Liquid nails
-
Wood glue
-
Wood filler
-
220 grit Sandpaper
-
White semi-gloss paint (Optional – for painting storage box)
-
Satin Bronze Metallic Spray Paint (Optional – for painting aluminum sheet)
Step 1: Build a frame / Opt for an existing frame as easy option
Apply wood glue on the mitered ends of the 1×4 pieces. For secure and strengthen option, attach flat corner braces and flat straight braces on 4 sides to hold the wood.

Step 2: Attach of Aluminum Sheet
Cut the aluminum sheet to size of the front frame and optional to spray the aluminum sheet spray paint of your desired color. After paint, attach it to the frame using stapler. Nail the colonial molding on top of the aluminum sheet using 3/4″ nails.

Step 3: Build Secret Compartment
- Place wood glue on the ends of the 1×3 pieces and arrange them to make a box frame.
- Place the secret compartment door (1/2″ plywood) inside the box and nail the box sides and back with 1 & 1/2″ nails.
- Mark where the Single Touch Latch needs to be positioned when closed, as well as the 90 degree angle hinges. Attach the push latch with the screws provided about half way down the side of the frame.
- Attach hinges first to the sides then to the secret compartment door. Nail the back of the secret compartment (1/4″ plywood) to the box frame. Attach the front face frame to the box frame using the flat hinges.


Step 4: Attach Mirror
Center the mirror on the secret compartment door with the used of liquid nails.

Step 5 (Optional): Paint with Desired Color
Fill holes and cracks of the jewelry box with wood filler and sand everything smooth. Tape off aluminum sheet and mirror and paint everything with 2 coats of desired paint (inside and out). In which, Rachel had her storage box painted with white.
Step 6: Attach Holder Racks & Magnetic Door Latch
Measure and mark desired placement of holder racks, where in this tutorial the holder is placed at 2 inches from the top and another holder at 6 inches below the previous holder. Additional holder or knob could be placed at the frame door or in the secret compartment as additional jewelry hanger.
Drill the hole for the magnetic latch using 1/2″ drill bit on the top corner of the secret compartment frame. Screw magnet holder into place and other end of latch on the top corner of the back frame door.

Step 7: Attach to wall
Attach the complete jewelry storage box to the wall using screws or a picture hanger hook.
And your jewelry organizer mounted on the wall is completed! It's time add some jewelry onto it.

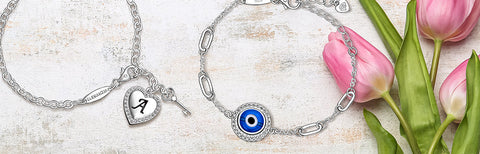
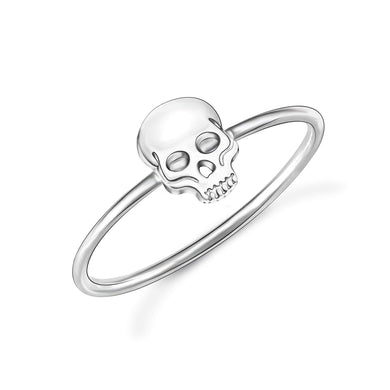
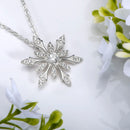
Shop our Sterling Silver Jewelry Here!


3. Repurpose recycled materials into jewelry organizer stand
Did you know you could also make a jewelry organizer from recycled materials? Follow Claire from blah-to-tada to repurpose the unwanted kitchen roll that are easy obtain at home and remodified into jewelry organizer that is stylish to display your jewelry.
Materials and tools required:
- Empty kitchen roll
- Glue
- Scissors / Craft Knife
- Felt / Fabric
- Cardboard / Thin Wood
Step 1: Prepare empty kitchen rolls.

Step 2: Cut a hole in the center of the empty kitchen roll using a pair of scissors or craft knife.

Step 3: Insert one end of the empty paper towel roll into the hole and secured with glue.


Step 4: Repeat step 3 with different heights.
Step 5: Cover the exterior of the organized empty paper towel roll with felt or fabric of your choice, before mount a thin layer of wood or sturdy cardboard as the base.
Compete look of the jewelry stand with necklace and bracelet for a neat display.


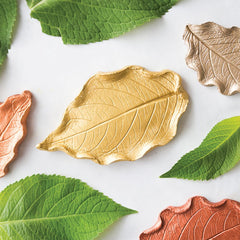
4. Jewelry storage display made with clay
You could also create your own jewelry storage with clay to mold your desired jewelry dish designs and measurements that you want. Inspired by the nature season, Kim from The Best Ideas for Kids has created the leaf clay jewelry dish which is perfect as personalized jewelry organizer to hold items such as jewelry, keys and coins.
-
Air Dry Clay
-
Leaves (Any choice of your preference, this tutorial is based on hydrangea leave)
-
Acrylic paint – we used rose gold, gold and bronze
-
Sealer – mod podge gloss
-
Knife
Step 1: Prepare leaves of your desired shape and air dry clay. Stamp the leaf onto the clay and press firmly to make sure all parts of the leaf get a complete imprint.

Step 2: Remove the leaf and cut around the outline of the leaf with a knife. Then, remove the excess clay.

Step 3 (Optional): You could choose to gently roll up the outline of the leaf or any pattern based on your liking and imagination.

Step 4: Allow the clay leaf to air dry and harden for 24 hours on a drying rack to ensure both top and bottom exposed to air. After 24 hours, to flip around to allow the bottom clay to air dry.

Step 5: Paint the clay dishes with your favorite color.
It is recommended to seal them with mod podge gloss or heavy duty sealer for as a protective layer towards the clay dishes. Hence, it is good to be used as jewelry holder!
With that, you are equipped with the knowledge on how to make a jewelry organizer by your own. These DIY jewelry organizers made the perfect jewelry storage to keep your jewelry safe and sorted. It does not just assist in saving time from searching jewelry, it also helps to prevent jewelry damages.
If you enjoy these DIY jewelry organizer ideas, share it with your family and friends to make the jewelry storage now and share with us your art craft!